I use BitBucket Pipelines with this blog and love it! This blog is compiled using Jekyll, and with Bitbucket, I can deploy it to my DigitalOcean Ubuntu server with one click.
I am currently learning React and learn best by doing real-world projects. For years I have maintained a photo blog where I have taken and published a photo each day. The most recent thumbnail is on the right column of this blog. In building a React version, I wanted to automate the deployment of it similar to this blog. I already use Bitbucket for its GIT repository, so using Pipelines is a natural fit.
This tutorial assumes that you have a repo on Bitbucket, and have a server that you can SSH access to. I may write more tutorial in the future on these topics if there is interest.
My React App
Nothing out of the ordinary here. In my the package.json file, I already have the initial task for the build step:
...
"scripts": {
    "start": "react-scripts start",
    "build": "react-scripts build",
    "test": "react-scripts test",
    "eject": "react-scripts eject"
  },
...
Server Setup
On my Ubuntu server, I host multiple websites, and each one has its own username and local home directory. This isolation helps with security and ensures that one application can’t access another through the server. On my server, I have a local username that I will call jessephotoreact and it has a home directory of /home/jessephotoreact/.
In the home directory, I will setup the following folder structure:
/home/jessephotoreact/.ssh
/home/jessephotoreact/html
/home/jessephotoreact/html/www
There are other folders, but not crucial to this tutorial.
Inside of html there is a folder called www which is the default/www subdomain. If there were other subdomains, I would create a folder for each of them.
Setup Bitbucket Pipelines
On the right column in Bitbucket, click on “Piplelines” and scroll down and select “JavaScript”:
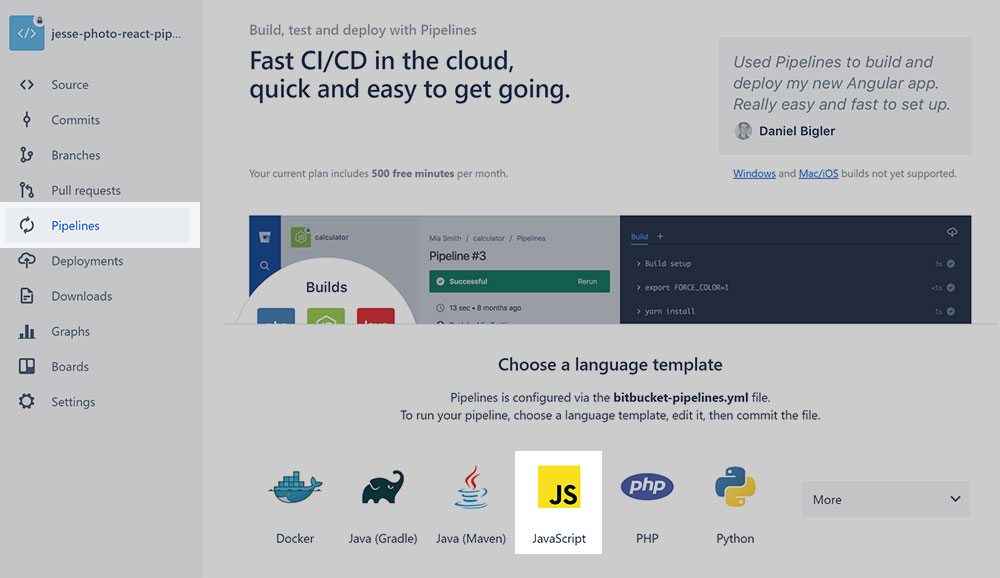
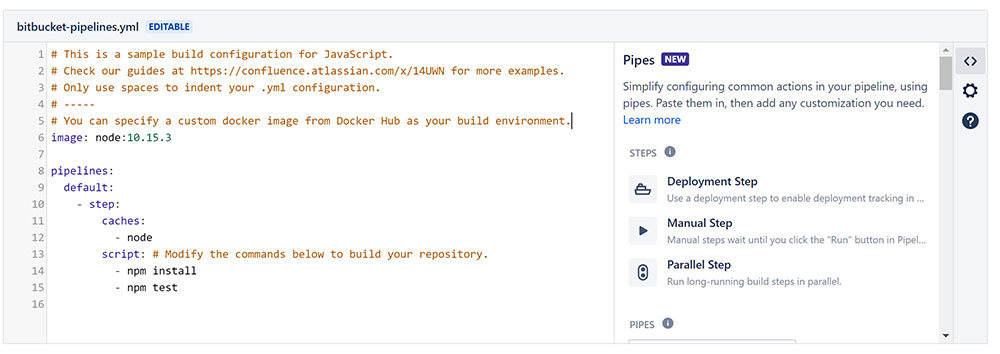
It will create a default pipeline file for you.
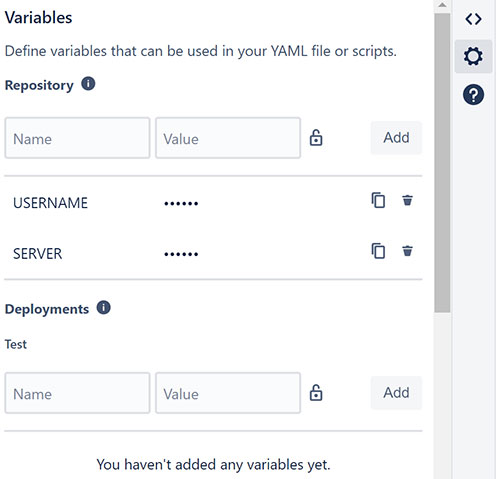
Setup variables
I like to reuse these pipeline files so create two variables within Bitbucket to assign things like username and server. Click on the cog icon on the right and under the Repository section create a new variable with the name USERNAME. The variable name should be uppercase to follow Bitbucket’s Naming Standard.
For the value, set your username, and click the lock icon to encrypt it. Create a second variable called SERVER with the address of your server.
Pipelines file
There are two steps in this simple pipeline. The first is to build the project locally and compress it into a single file. The second step will take this compressed file, publish it to the server, and unzip it.
#bitbucket-pipelines.yml
image: node:10.15.3

pipelines:
  default:
    - step:
        name: Build React Project
        script:
          - npm install
          - npm run-script build
          - mkdir packaged
          - tar -czvf packaged/package-${BITBUCKET_BUILD_NUMBER}.tar.gz -C build .
        artifacts:
          - packaged/**
    - step:
        name: Deploy to Web
        image: alpine
        trigger: manual
        deployment: production
        script:
          - mkdir upload
          - tar -xf packaged/package-${BITBUCKET_BUILD_NUMBER}.tar.gz -C upload
          - apk update && apk add openssh rsync
          - rsync -a  -e "ssh -o StrictHostKeyChecking=no" --delete upload/ $USERNAME@$SERVER:html/temp/react-${BITBUCKET_BUILD_NUMBER}
          - ssh -o StrictHostKeyChecking=no $USERNAME@$SERVER "rm -r html/www"
          - ssh -o StrictHostKeyChecking=no $USERNAME@$SERVER "mv 'html/temp/react-${BITBUCKET_BUILD_NUMBER}' 'html/www'"
          - ssh -o StrictHostKeyChecking=no $USERNAME@$SERVER "chmod -R u+rwX,go+rX,go-w html/www"
Step 1 installs the repo and runs the build step outputting the files into the /build folder. Next, it creates a folder called /packaged and zips the contents of the build directory and saves it into this new folder.
Artifacts are what allows files to be passed from step to step and by compressing them into a single file, it speeds this up.
Step 2 creates a new directory and unzips the artifacts files into it. Next, on line 23, we install the openssh and rsync programs to help with the transfer. Line 24 transfers the /upload folder from Bitbucket to your server with the variables that were defined earlier. It places it into a /temp/react-_#_ folder.
Next, line 25 deletes the existing www folder and line 26 moves the temp folder to the www folder. The final line updates the permissions of the folder and contents. Pipelines makes all folders 777 which is bad for security. This line changes folders to 755 and files to 644.
Run the pipeline
When you push a branch to Bitbucket the Pipeline will automatically run. As you can see from below, I failed a lot of times before I got the configuration correct:
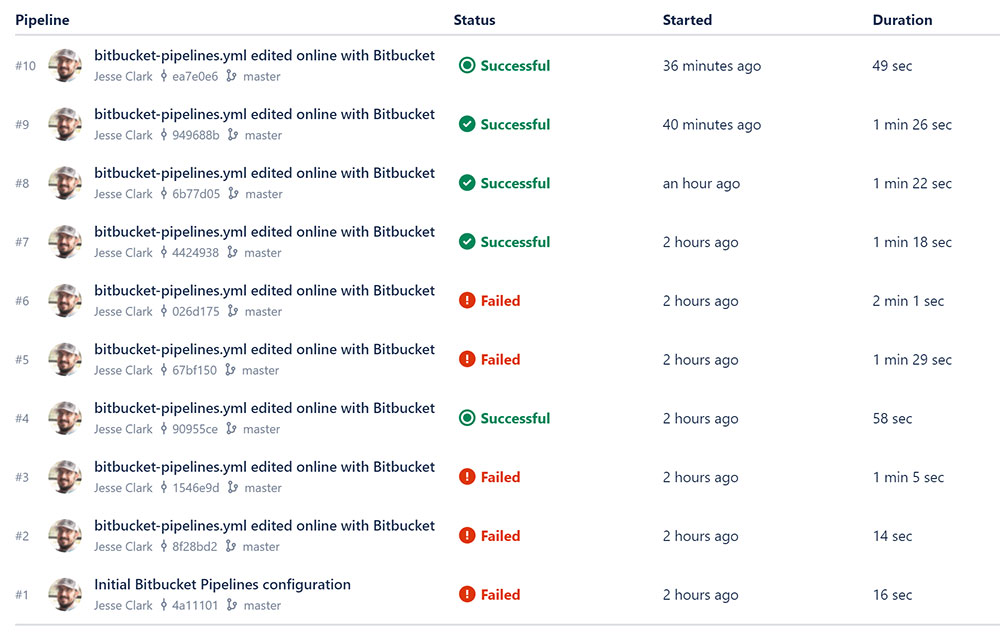
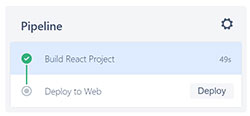
Notice the icon for the first run; it doesn’t have a checkbox by it. This is because the first step has been run, but the second has not. In the pipelines file above, on line 18, we set the deployment step to be manual: trigger: manual. When I click on the pipeline, I can see that the first step was completed. Now, I need to click the Deploy button to make it live.
 The Meetings Are the Work
 Writing Code Was the Easy Part
The speedup is real. It's just smaller than the marketing.
Writing Code Was the Easy Part
The speedup is real. It's just smaller than the marketing.
 I Give Advice 75% of the Time. I'm Trying to Get to 50.